Today was the University of Memphis – Herff College Engineering Day. Since I was doing a robot info table for the event, I decided to do a very simple demo of the XRP during the day.
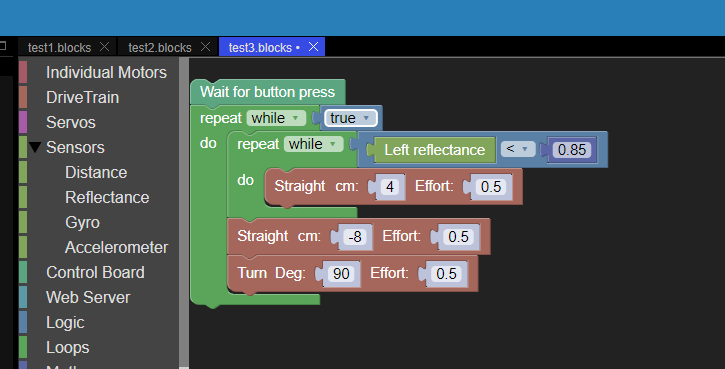
I found programming the robot very easy using the https://xrpcode.wpi.edu/ online Visual Block Editor and and wrote a program to move the robot forward until it found the black tape then back up, then turn 90 degrees and loop back to going forward. The code looked like:
Here is a video I took (Sorry it is so noisy, I took it during the open house)
I did notice that some times the robot would stop and shimmy back and forth (I am not sure, but it looked to me as if it did not have enough dead-band on the sensor and would get stuck on the turn, so I told it to do a 90 degree turn, it overshot to 91 deg, then overshot the other way 89 degrees and got stuck doing over and over again), but a tap on the robot would get it going again.
Since it was a “Table top demo” I really couldn’t do much else, but considering I never programmed the robot before this (other than test code), I found the programming intuitive and easy to do, and even getting the code to upload and run was easy (compared to other robot’s I have used).
I wish the “User Button” was a little easier to locate, but waiting for the button press allowed me to disconnect the USB cord from the computer before the robot started to move.
I do like the fact that the online programming does not require any major software installs (just a com port driver). I would like to know if that install can be done in most schools without getting IT involved. Many robots for schools have the issue of getting IT to install the software in a timely manor on classroom computers, delaying the kids getting started on a robot project or getting ready for a competition.